

We offer a choice of paper finishes to suit different types of printed artwork. Each has its own look and feel, so the best option will depend on the style of your design and the finish you prefer.
Gloss
Gloss paper has a smooth, shiny surface that helps colours appear bright and vibrant. It works particularly well for designs containing photographs, bold graphics and strong colours where you want the print to have a more striking finish.
Silk
Silk paper has a smooth finish with a softer, more subtle sheen than gloss. It offers a good balance between vibrant colour reproduction and easy readability, making it a popular all-round choice for many types of printed material.
Uncoated Card
Uncoated card has a smooth, natural surface without the shiny coating found on gloss or silk papers. Colours have a softer, more understated appearance, while text remains clear and easy to read. It is also suitable for writing on, making it a good choice for items where customers may need to add notes, names or other information by hand.
Please note that colours can look slightly different depending on the paper finish you choose. Gloss generally gives a brighter, more vibrant appearance, while silk and uncoated finishes offer a softer look.
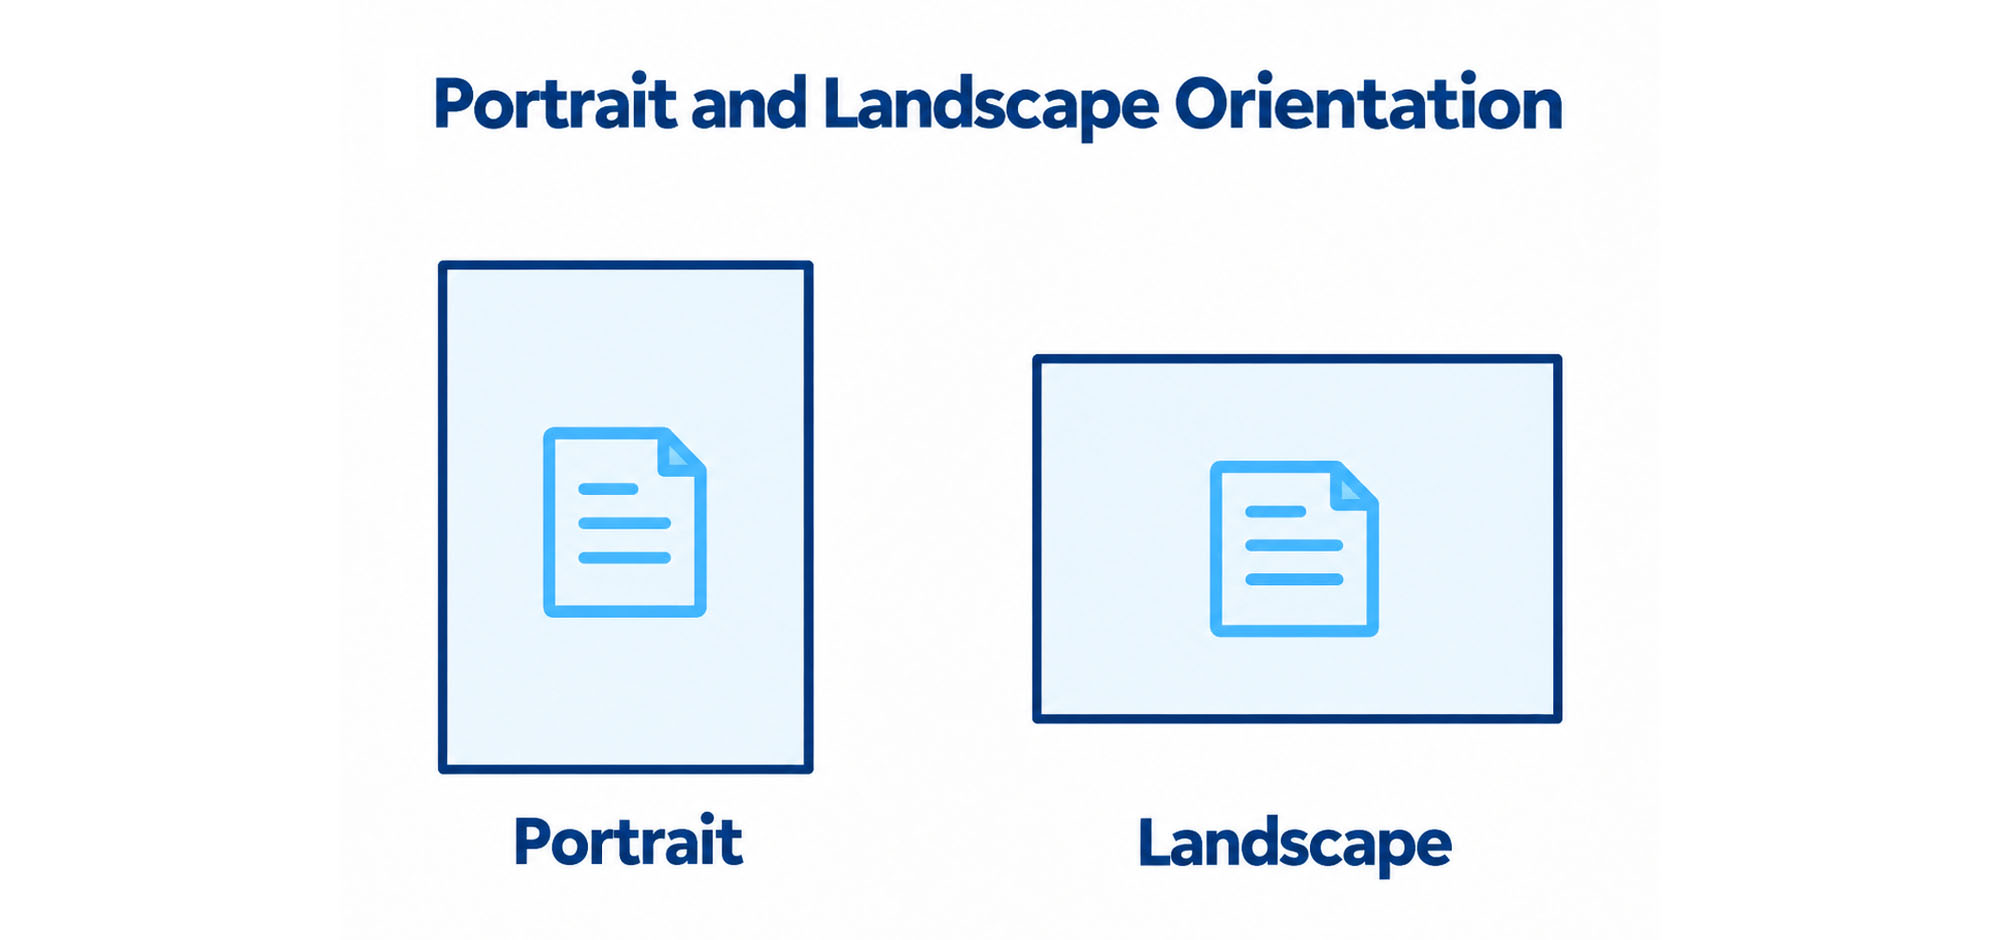
Orientation refers to the direction your artwork is designed and printed.
Portrait
Portrait artwork is taller than it is wide. This is often used for designs where the page is viewed vertically.
Landscape
Landscape artwork is wider than it is tall. This is often used for designs where the page is viewed horizontally.
When supplying your artwork, please make sure the orientation you select matches the orientation of your design. If your artwork is supplied in a different orientation, it may need to be rotated or adjusted before printing.
The finished size remains the same - only the direction of the design changes.
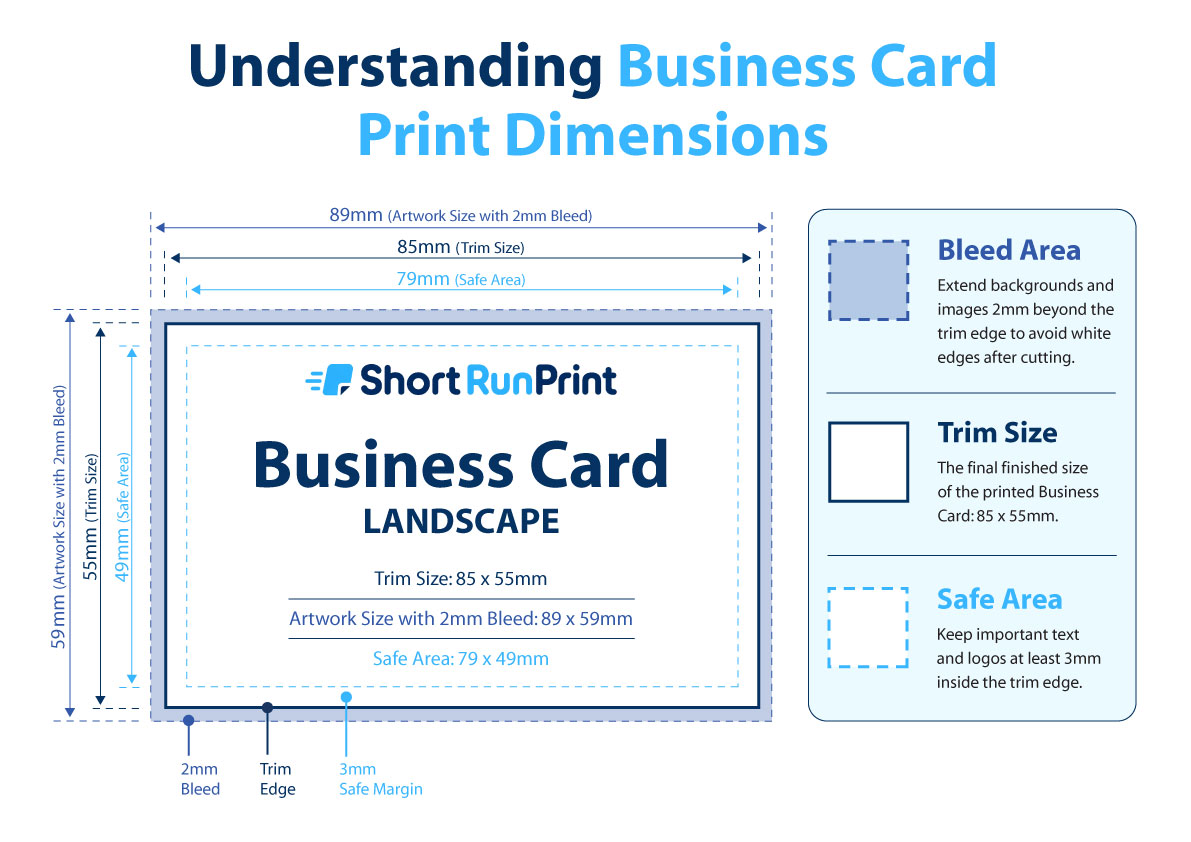
Your finished business card will measure 85 x 55mm. If your background, image or colour is intended to print right to the edge, your artwork should include an additional 2mm bleed on every side.
This means your supplied artwork should measure 89 x 59mm including bleed. The bleed area is trimmed away during finishing and helps prevent unwanted white edges around your card.
We also recommend keeping important text, logos and contact details at least 3mm inside the finished edge. This safe area helps ensure important elements are not too close to the trim line.
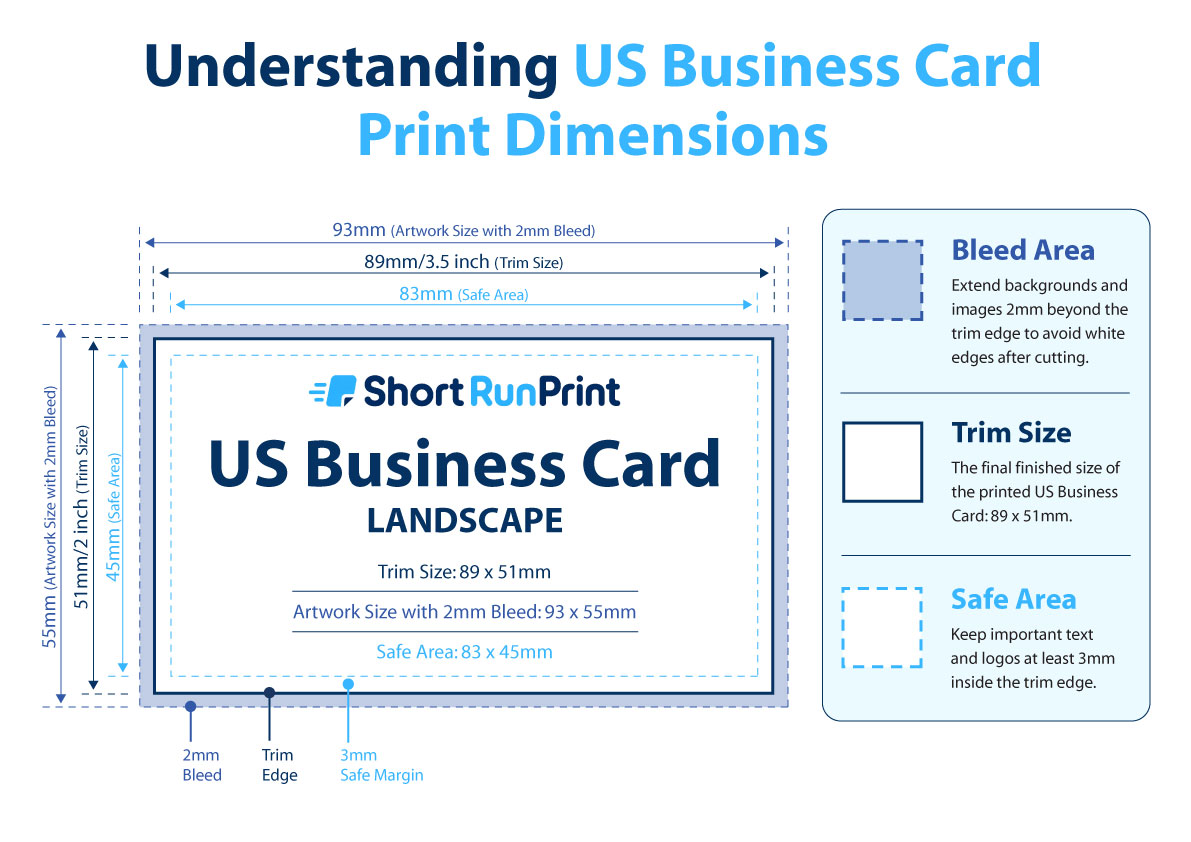
Your finished business card will measure 89 x 51mm. If your background, image or colour is intended to print right to the edge, your artwork should include an additional 2mm bleed on every side.
This means your supplied artwork should measure 93 x 55mm including bleed. The bleed area is trimmed away during finishing and helps prevent unwanted white edges around your card.
We also recommend keeping important text, logos and contact details at least 3mm inside the finished edge. This safe area helps ensure important elements are not too close to the trim line.
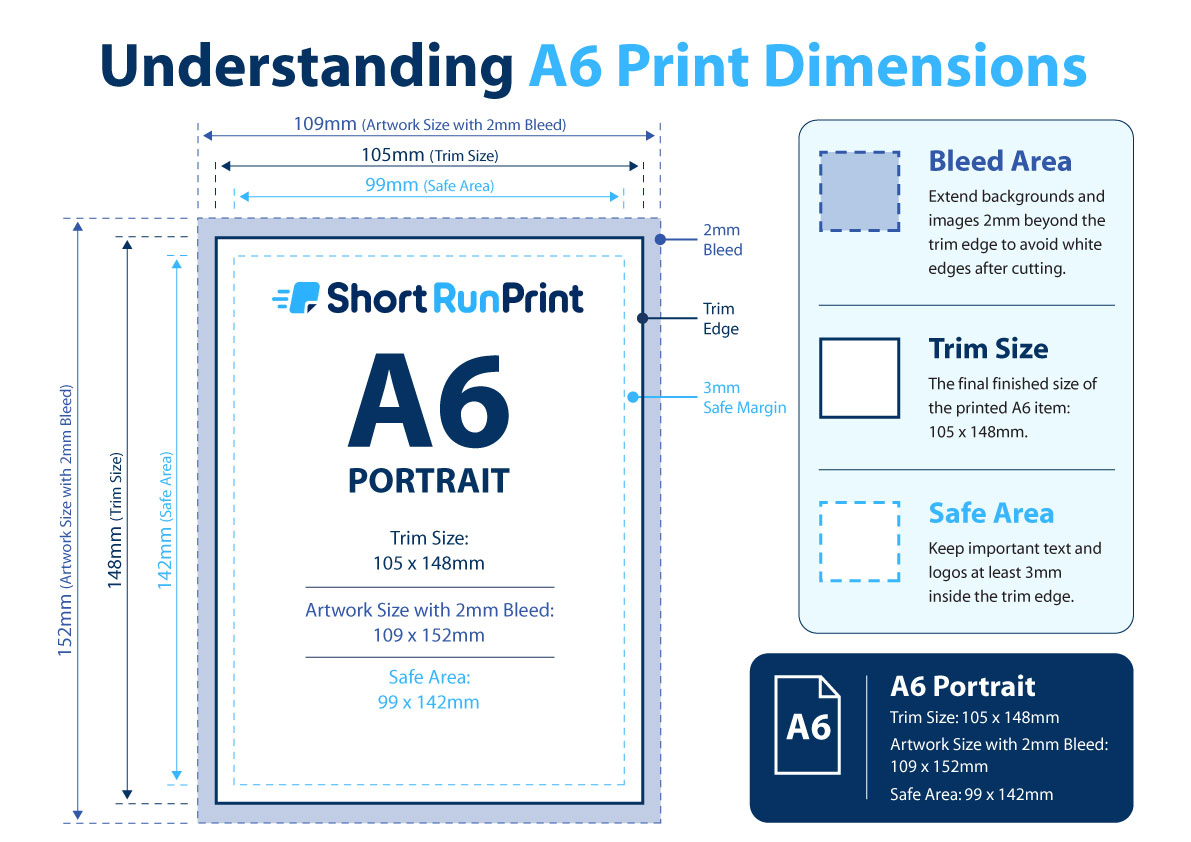
Your finished A6 print will measure 105 x 148mm. If your background, image or colour is intended to print right to the edge, your artwork should include an additional 2mm bleed on every side.
This means your supplied artwork should measure 109 x 152mm including bleed. The bleed area is trimmed away during finishing and helps prevent unwanted white edges around the finished print.
We also recommend keeping important text, logos and other essential elements at least 3mm inside the finished edge. This safe area helps ensure important content does not sit too close to the trim line.
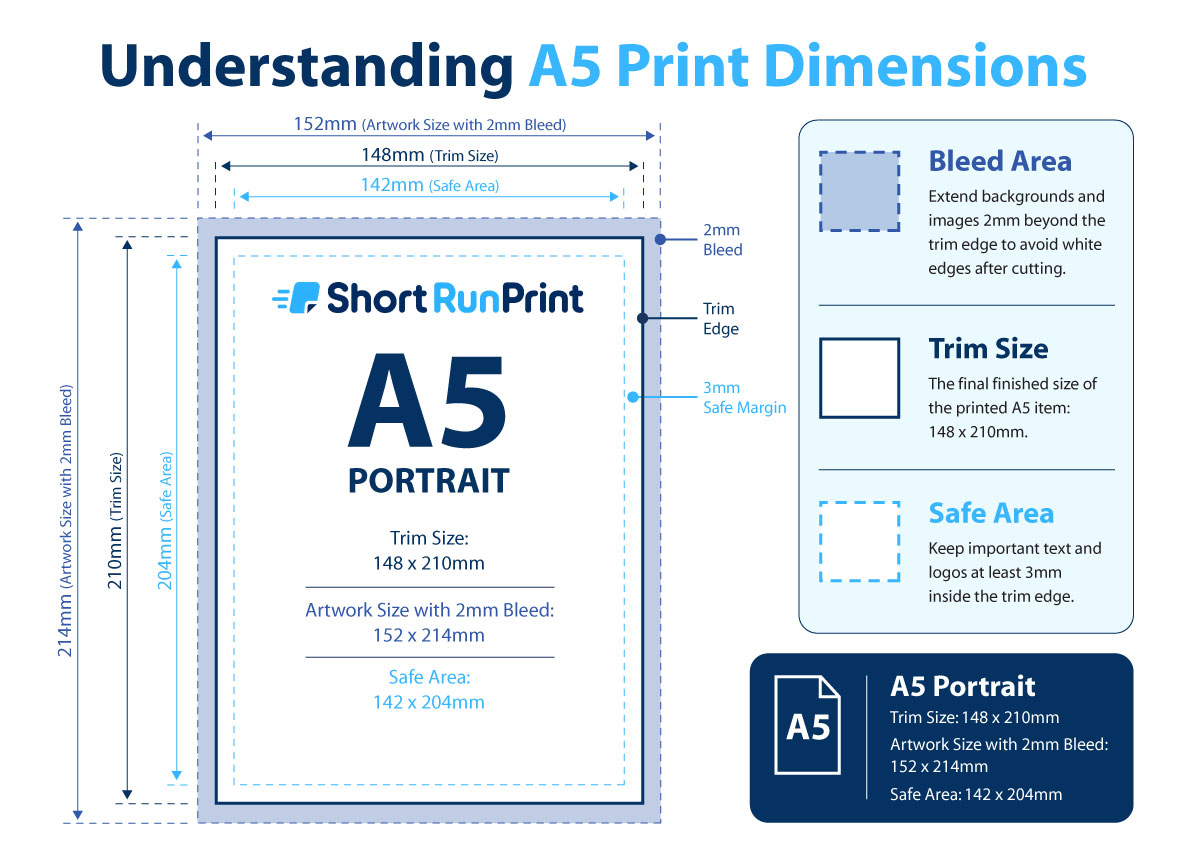
Your finished A5 print will measure 148 x 210mm. If your background, image or colour is intended to print right to the edge, your artwork should include an additional 2mm bleed on every side.
This means your supplied artwork should measure 152 x 214mm including bleed. The bleed area is trimmed away during finishing and helps prevent unwanted white edges around the finished print.
We also recommend keeping important text, logos and other essential elements at least 3mm inside the finished edge. This safe area helps ensure important content does not sit too close to the trim line.
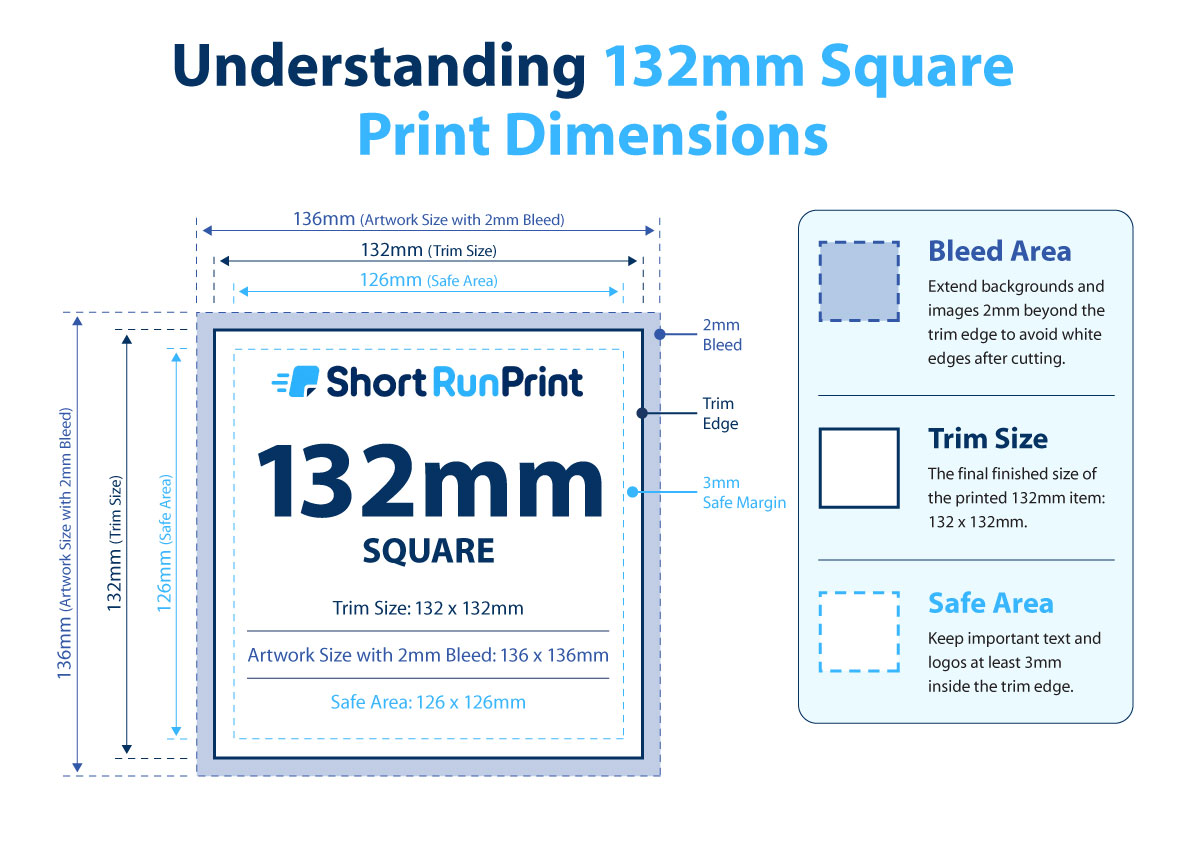
Your finished square print will measure 132 x 132mm. If your background, image or colour is intended to print right to the edge, your artwork should include an additional 2mm bleed on every side.
This means your supplied artwork should measure 136 x 136mm including bleed. The bleed area is trimmed away during finishing and helps prevent unwanted white edges around the finished print.
We also recommend keeping important text, logos and other essential elements at least 3mm inside the finished edge. This safe area helps ensure important content does not sit too close to the trim line.
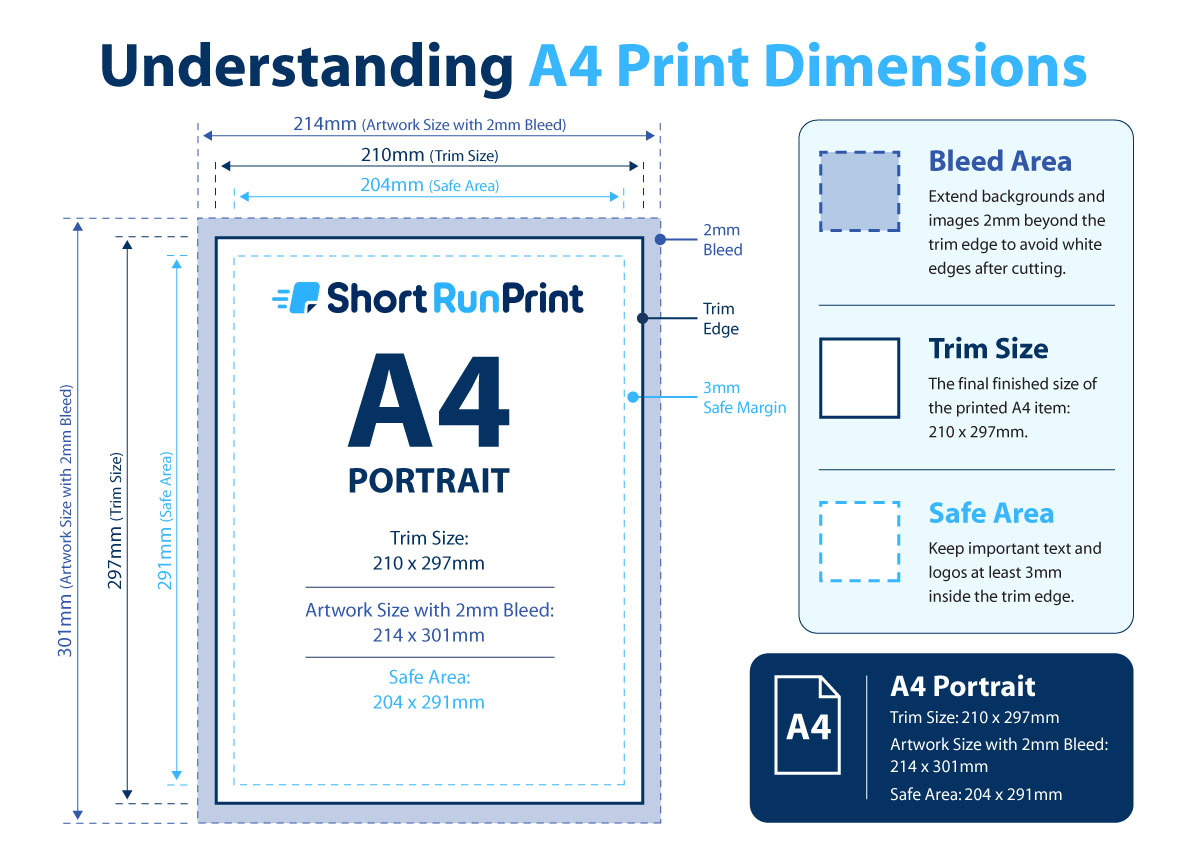
Your finished A4 poster will measure 210 x 297mm. If your background, image or colour is intended to print right to the edge, your artwork should include an additional 2mm bleed on every side.
This means your supplied artwork should measure 214 x 301mm including bleed. The bleed area is trimmed away during finishing and helps prevent unwanted white edges around the finished poster.
We also recommend keeping important text, logos and other essential elements at least 3mm inside the finished edge. This safe area helps ensure important content does not sit too close to the trim line.
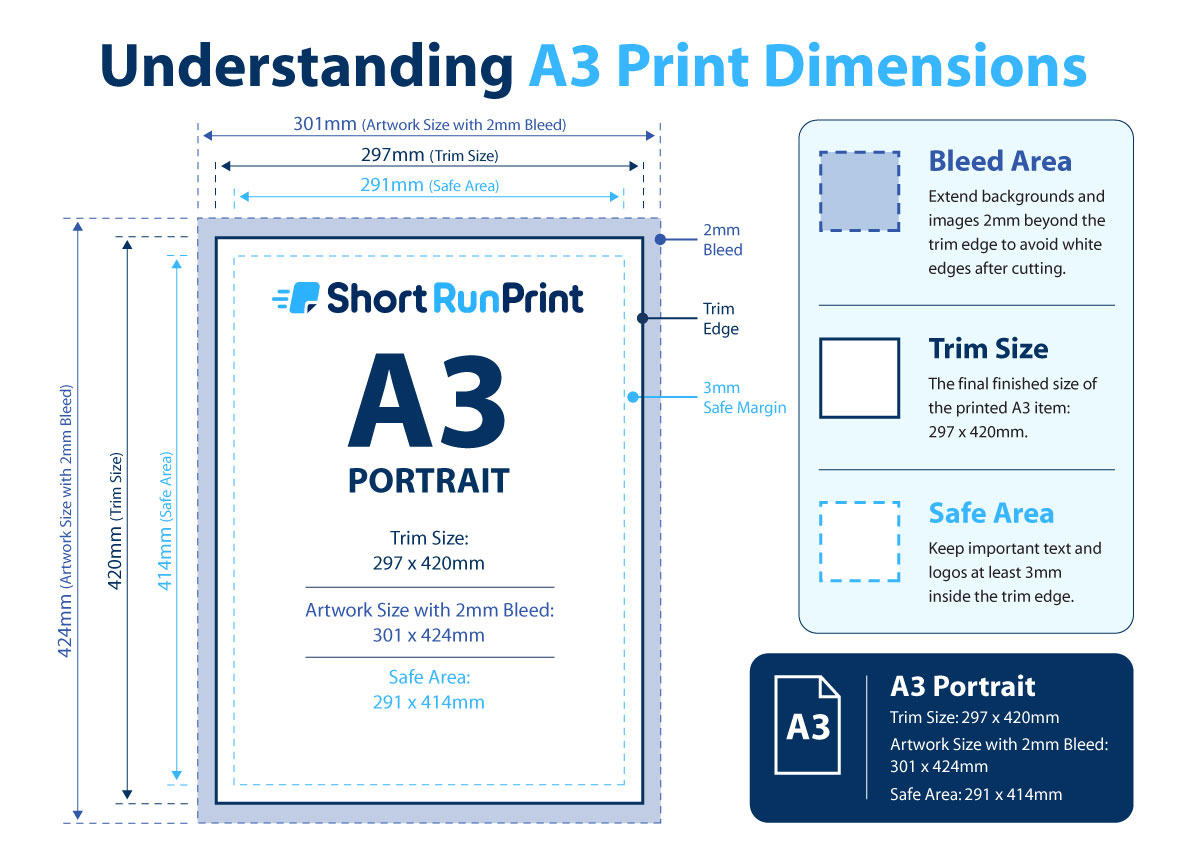
Your finished A3 poster will measure 297 x 420mm. If your background, image or colour is intended to print right to the edge, your artwork should include an additional 2mm bleed on every side.
This means your supplied artwork should measure 301 x 424mm including bleed. The bleed area is trimmed away during finishing and helps prevent unwanted white edges around the finished poster.
We also recommend keeping important text, logos and other essential elements at least 3mm inside the finished edge. This safe area helps ensure important content does not sit too close to the trim line.
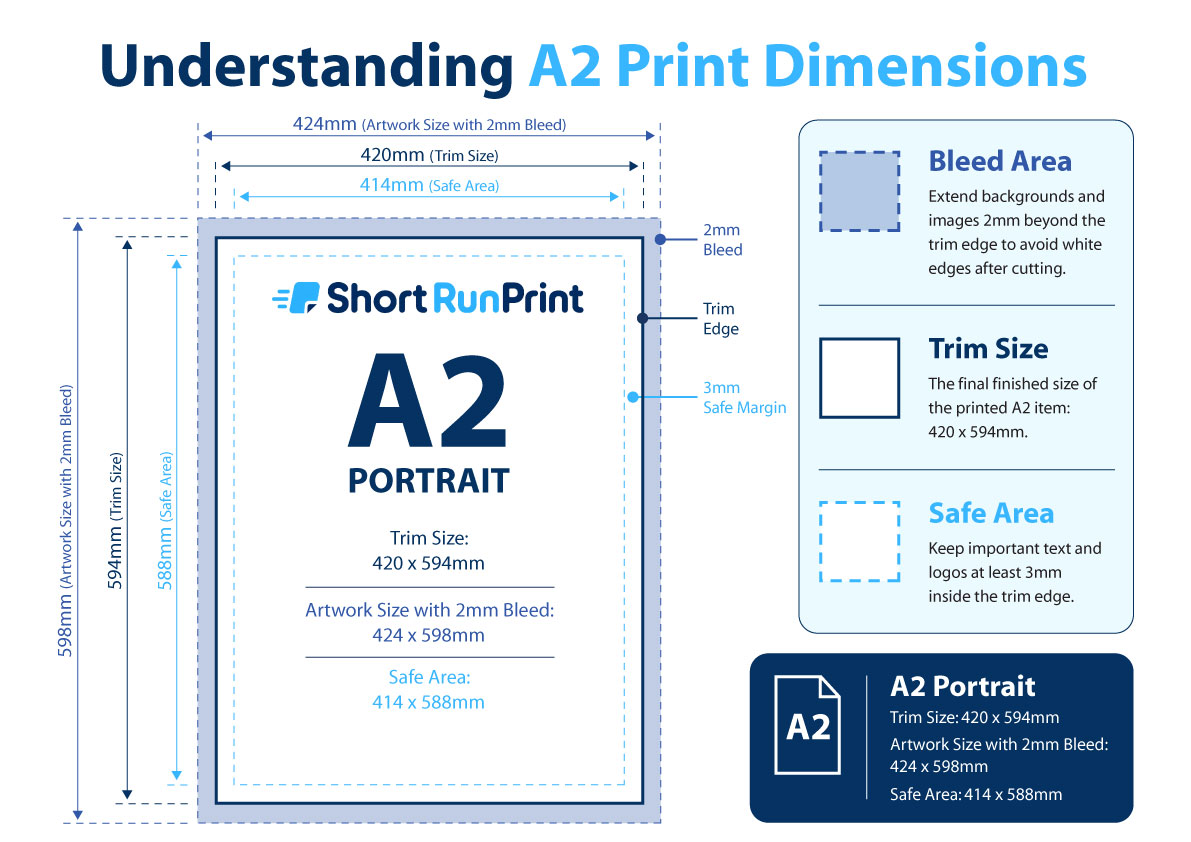
Your finished A2 poster will measure 420 x 594mm. If your background, image or colour is intended to print right to the edge, your artwork should include an additional 2mm bleed on every side.
This means your supplied artwork should measure 424 x 598mm including bleed. The bleed area is trimmed away during finishing and helps prevent unwanted white edges around the finished poster.
We also recommend keeping important text, logos and other essential elements at least 3mm inside the finished edge. This safe area helps ensure important content does not sit too close to the trim line.
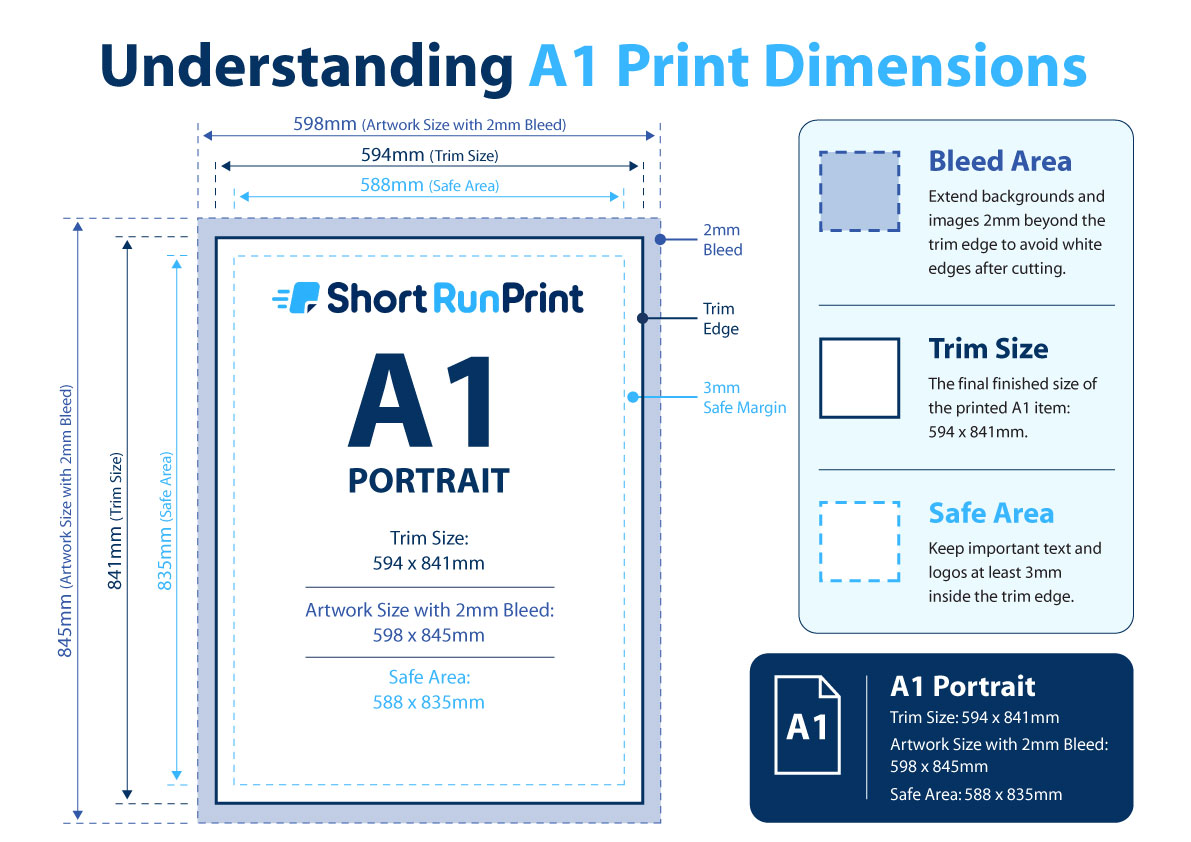
Your finished A1 poster will measure 594 x 841mm. If your background, image or colour is intended to print right to the edge, your artwork should include an additional 2mm bleed on every side.
This means your supplied artwork should measure 598 x 845mm including bleed. The bleed area is trimmed away during finishing and helps prevent unwanted white edges around the finished poster.
We also recommend keeping important text, logos and other essential elements at least 3mm inside the finished edge. This safe area helps ensure important content does not sit too close to the trim line.